Test Block Top

The Blog...
Articles, Tips & Trick and Other Interesting Information...
26 April 2012

Redirect Situs Menggunakan File .htaccess

Pada artikel ini akan sedikit mengulas tentang cara melakukan redirect situs atau halaman tertentu konten situs mengunakan file .htaccess. Efek redirect ini tidak akan berpengaruh pada email yang terkait dengan domain anda.

Langkah pertama buatlah file text kosong menggunakan software text editor (notepad misalnya), kemudian simpan dengan nama htaccess.txt.


Peringatan:


.htaccess merupakan file konfigurasi yang sangat berpengaruh terhadap suatu website. Meskipun mungkin anda secara tidak sengaja melupakan hal yang sepele (lupa menambahkan spasi misalnya) dapat menyebabkan halaman website tidak akan terbuka (berfungsi) sama sekali.

Dikarenakan .htaccess merupakan file sistem yang tersembunyi, pastikan software ftp anda terkonfigurasi untuk menampilkan file-file yang tersembunyi.  Biasanya opsi ini dapat anda temukan pada menu "Preferences / Options" program FTP anda.

Catatan:


Alasan mengapa anda harus menyimpan file tersebut dengan nama "htaccess.txt" adalah karena sebagian besar sistem operasi dan program FTP secara default tidak dapat mengenali (membaca) file ".htaccess". Setelah file "htaccess.txt" berhasil diupload ke webserver, rename file "htaccess.txt" menjadi ".htaccess".
Sisipkan code di bawah ini untuk meredirect situs atau halaman tertentu website anda:

Mengalihkan url situs utama ke url situs yang lain, contoh: "domain-anda.com" diarahkan ke "domain-anda.net":


# Perintah ini berfungsi untuk mengalihkan keseluruhan website ke domain yang lain
Redirect 301 / http://linggihnote.blogspot.com/

Mengalihkan (redirect) file "index.html" ke folder / sub folder tertentu:


# Perintah ini berfungsi untuk mengalihkan halaman utama index.html ke folder atau subfolder tertentu
Redirect /index.html http://linggihnote.blogspot.com/folder-baru/

Mengalihkan (redirect) file lama ke file baru (direktori / folder yang berbeda):


# Perintah ini berfungsi untuk mengalihkan folder lama ke folder yang baru
Redirect /direktorilama/filelama.html http://linggihnote.blogspot.com/direktoribaru/filebaru.html

Mengalihkan (redirect) index situs ke index halaman tertentu:


# Perintah ini berfungsi untuk menentukan index halaman tertentu
DirectoryIndex index.php

Redirect user untuk mengakses situs tanpa menggunakan prefix "www.":


# Redirect semua visitor untuk akses situs tanpa menggunakan prefix www.,
# (http://www.situsanda.com/... akan dialihkan ke http://situsanda.com/...)
# penerapannya adalah melalui cara berikut ini:

RewriteEngine On
RewriteCond %{HTTP_HOST} ^www\.linggih\.com$ [NC]
RewriteRule ^(.*)$ http://linggihnote.blogspot.com/$1 [L,R=301]

Redirect user untuk mengakses situs menggunakan prefix "www.":


# Redirect semua visitor untuk akses situs dengan menggunakan prefix www.,
# (http://domain-anda.com/... akan dialihkan ke http://www.domain-anda.com/...)
# penerapannya adalah melalui cara berikut ini:

RewriteEngine On
RewriteCond %{HTTP_HOST} !^www\.linggih\.com$ [NC]
RewriteRule ^(.*)$ http://www.linggihnote.blogspot.com/$1 [L,R=301]

Redirect user situs ke versi aman domain anda (akses ke SSL):


# Cara paling mudah untuk redirect visitor selalu akses secure connection (https://) dapat dilakukan dengan cara di bawah ini:
RewriteEngine On
RewriteCond %{SERVER_PORT} 80
RewriteRule ^(.*)$ https://www.linggihnote.blogspot.com/$1 [R,L]

Redirect user akses prefix "www." ke "http://" dan "https://":


RewriteEngine On

RewriteCond %{SERVER_PORT} 80
RewriteCond %{HTTP_HOST} !^www\.linggih\.com$ [NC]
RewriteRule ^(.*)$ http://www.linggihnote.blogspot.com/$1 [L,R=301]

RewriteCond %{SERVER_PORT} 443
RewriteCond %{HTTP_HOST} !^www\.linggih\.com$ [NC]
RewriteRule ^(.*)$ https://www.linggihnote.blogspot.com/$1 [L,R=301]

Redirect visitor ke "https://" untuk folder (direktori) tertentu:


# Jika anda menginginkan https diterapkan pada folder tertentu gunakan perintah berikut ini:
RewriteEngine On
RewriteCond %{SERVER_PORT} 80
RewriteCond %{REQUEST_URI} foldersaya
RewriteRule ^(.*)$ https://www.linggihnote.blogspot.com/foldersaya/$1 [R,L]

Setelah selesai & semua command (perintah) sudah ditulis dengan benar, upload ke webserver anda. Jangan lupa rename file "htaccess.txt" menjadi ".htaccess".

Semoga bermanfaat.
:)
24 April 2012

Disable Iptables Firewall CentOS

Ada kalanya Iptables Firewall pada sistem operasi UNIX perlu di non-aktifkan (disable) dengan beberapa alasan, salah satunya jika sistem operasi digunakan untuk keperluan testing & development. Pada artikel kali ini menyajikan cara disable Iptables Firewall pada CentOS, dengan tahapan sebagai berikut:
  1. Simpan setting Firewall sebelum disable Iptables dengan mengetikkan command:

    service iptables save


    [root@rhel6 ~]# service iptables save
    iptables: Saving firewall rules to /etc/sysconfig/iptables:[  OK  ]

    service ip6tables save


    [root@server5 ~]# service ip6tables save
    ip6tables: Saving firewall rules to /etc/sysconfig/ip6table[  OK  ]

  2. Stop Iptables. Command:

    service iptables stop


    [root@server5 ~]# service iptables stop
    iptables: Flushing firewall rules:                         [  OK  ]
    iptables: Setting chains to policy ACCEPT: filter          [  OK  ]
    iptables: Unloading modules:                               [  OK  ]
    [root@server5 ~]#

    service ip6tables stop


    [root@server5 ~]# service ip6tables stop
    ip6tables: Flushing firewall rules:                        [  OK  ]
    ip6tables: Setting chains to policy ACCEPT: filter         [  OK  ]
    ip6tables: Unloading modules:                              [  OK  ]
    [root@server5 ~]#

  3. Disable Start Up Booting Iptables. Command:

    chkconfig iptables off


    [root@server5 ~]# chkconfig iptables off
    [root@server5 ~]#

    chkconfig ip6tables off


    [root@server5 ~]# chkconfig ip6tables off
    [root@server5 ~]#

Semoga bermanfaat
:)
23 April 2012

Install Webmin Pada CentOS 6.2

Webmin merupakan web interface yang digunakan oleh sistem administrator pada OS Unix. Webmin dapat diakses menggunakan hampir semua web browser yang ada saat ini, dengan syarat browser harus sudah support tabel, form dan Java (Java untuk module File Manager). Dengan menggunakan webmin, sistem administrator dapat setup user account, DNS, Apache, Database dan lain sebagainya.

Install webmin sangatlah mudah. Berikut panduan singkat install Webmin (OS menggunakan CentOS 6.2):

Install Package "perl-Net-SSLeay" menggunakan command:


yum -y install perl-Net-SSLeay


[root@server5 ~]# yum -y install perl-Net-SSLeay
Loaded plugins: fastestmirror
base                                                     | 3.7 kB     00:00
http://centos.biz.net.id/6.2/os/x86_64/repodata/ceb77f94eaccd4b2ec5546135bdd06692393e7deb6e8aaf86d6f479b84bec06b-primary.sqlite.bz2: [Errno 14] PYCURL ERROR 18 - "transfer closed with 4683564 bytes remaining to read"
Trying other mirror.
base/primary_db                                          | 4.5 MB     00:19
extras                                                   | 3.5 kB     00:00
http://centos.biz.net.id/6.2/extras/x86_64/repodata/b1cda4f460b583687346e0a7ce7bed67049498506434134bdd172f7b59f2b271-primary.sqlite.bz2: [Errno 14] PYCURL ERROR 22 - "The requested URL returned error: 403"
Trying other mirror.
extras/primary_db                                        | 6.3 kB     00:00
updates                                                  | 3.5 kB     00:00
updates/primary_db                                       | 2.9 MB     00:12
Setting up Install Process
Resolving Dependencies
--> Running transaction check
---> Package perl-Net-SSLeay.x86_64 0:1.35-9.el6 will be installed
--> Processing Dependency: perl >= 5.005_03 for package: perl-Net-SSLeay-1.35-9.el6.x86_64
--> Processing Dependency: perl(:MODULE_COMPAT_5.10.1) for package: perl-Net-SSLeay-1.35-9.el6.x86_64
--> Processing Dependency: perl(Errno) for package: perl-Net-SSLeay-1.35-9.el6.x86_64
--> Processing Dependency: perl(strict) for package: perl-Net-SSLeay-1.35-9.el6.x86_64
--> Processing Dependency: perl(AutoLoader) for package: perl-Net-SSLeay-1.35-9.el6.x86_64
--> Processing Dependency: perl(vars) for package: perl-Net-SSLeay-1.35-9.el6.x86_64
--> Processing Dependency: perl(Exporter) for package: perl-Net-SSLeay-1.35-9.el6.x86_64
--> Processing Dependency: perl(Socket) for package: perl-Net-SSLeay-1.35-9.el6.x86_64
--> Processing Dependency: perl(Carp) for package: perl-Net-SSLeay-1.35-9.el6.x86_64
--> Running transaction check
---> Package perl.x86_64 4:5.10.1-119.el6_1.1 will be installed
--> Processing Dependency: perl-libs = 4:5.10.1-119.el6_1.1 for package: 4:perl-5.10.1-119.el6_1.1.x86_64
--> Processing Dependency: perl-libs for package: 4:perl-5.10.1-119.el6_1.1.x86_64
--> Processing Dependency: perl(Pod::Simple) for package: 4:perl-5.10.1-119.el6_1.1.x86_64
--> Processing Dependency: perl(version) for package: 4:perl-5.10.1-119.el6_1.1.x86_64
--> Processing Dependency: perl(Module::Pluggable) for package: 4:perl-5.10.1-119.el6_1.1.x86_64
--> Processing Dependency: libperl.so()(64bit) for package: 4:perl-5.10.1-119.el6_1.1.x86_64
--> Running transaction check
---> Package perl-Module-Pluggable.x86_64 1:3.90-119.el6_1.1 will be installed
---> Package perl-Pod-Simple.x86_64 1:3.13-119.el6_1.1 will be installed
--> Processing Dependency: perl(Pod::Escapes) >= 1.04 for package: 1:perl-Pod-Simple-3.13-119.el6_1.1.x86_64
---> Package perl-libs.x86_64 4:5.10.1-119.el6_1.1 will be installed
---> Package perl-version.x86_64 3:0.77-119.el6_1.1 will be installed
--> Running transaction check
---> Package perl-Pod-Escapes.x86_64 1:1.04-119.el6_1.1 will be installed
--> Finished Dependency Resolution

Dependencies Resolved

================================================================================
 Package                   Arch       Version                    Repository
                                                                           Size
================================================================================
Installing:
 perl-Net-SSLeay           x86_64     1.35-9.el6                 base     173 k
Installing for dependencies:
 perl                      x86_64     4:5.10.1-119.el6_1.1       base      10 M
 perl-Module-Pluggable     x86_64     1:3.90-119.el6_1.1         base      37 k
 perl-Pod-Escapes          x86_64     1:1.04-119.el6_1.1         base      30 k
 perl-Pod-Simple           x86_64     1:3.13-119.el6_1.1         base     209 k
 perl-libs                 x86_64     4:5.10.1-119.el6_1.1       base     575 k
 perl-version              x86_64     3:0.77-119.el6_1.1         base      49 k

Transaction Summary
================================================================================
Install       7 Package(s)

Total download size: 11 M
Installed size: 36 M
Downloading Packages:
(1/7): perl-5.10.1-119.el6_1.1.x86_64.rpm                |  10 MB     00:44
(2/7): perl-Module-Pluggable-3.90-119.el6_1.1.x86_64.rpm |  37 kB     00:00
(3/7): perl-Net-SSLeay-1.35-9.el6.x86_64.rpm             | 173 kB     00:00
(4/7): perl-Pod-Escapes-1.04-119.el6_1.1.x86_64.rpm      |  30 kB     00:00
(5/7): perl-Pod-Simple-3.13-119.el6_1.1.x86_64.rpm       | 209 kB     00:00
(6/7): perl-libs-5.10.1-119.el6_1.1.x86_64.rpm           | 575 kB     00:02
(7/7): perl-version-0.77-119.el6_1.1.x86_64.rpm          |  49 kB     00:00
--------------------------------------------------------------------------------
Total                                           232 kB/s |  11 MB     00:49
warning: rpmts_HdrFromFdno: Header V3 RSA/SHA1 Signature, key ID c105b9de: NOKEY
Retrieving key from file:///etc/pki/rpm-gpg/RPM-GPG-KEY-CentOS-6
Importing GPG key 0xC105B9DE:
 Userid : CentOS-6 Key (CentOS 6 Official Signing Key) 
 Package: centos-release-6-2.el6.centos.7.x86_64 (@anaconda-CentOS-201112091719.x86_64/6.2)
 From   : /etc/pki/rpm-gpg/RPM-GPG-KEY-CentOS-6
Running rpm_check_debug
Running Transaction Test
Transaction Test Succeeded
Running Transaction
  Installing : 1:perl-Pod-Escapes-1.04-119.el6_1.1.x86_64                   1/7
  Installing : 1:perl-Module-Pluggable-3.90-119.el6_1.1.x86_64              2/7
  Installing : 4:perl-libs-5.10.1-119.el6_1.1.x86_64                        3/7
  Installing : 1:perl-Pod-Simple-3.13-119.el6_1.1.x86_64                    4/7
  Installing : 3:perl-version-0.77-119.el6_1.1.x86_64                       5/7
  Installing : 4:perl-5.10.1-119.el6_1.1.x86_64                             6/7
  Installing : perl-Net-SSLeay-1.35-9.el6.x86_64                            7/7

Installed:
  perl-Net-SSLeay.x86_64 0:1.35-9.el6

Dependency Installed:
  perl.x86_64 4:5.10.1-119.el6_1.1
  perl-Module-Pluggable.x86_64 1:3.90-119.el6_1.1
  perl-Pod-Escapes.x86_64 1:1.04-119.el6_1.1
  perl-Pod-Simple.x86_64 1:3.13-119.el6_1.1
  perl-libs.x86_64 4:5.10.1-119.el6_1.1
  perl-version.x86_64 3:0.77-119.el6_1.1

Complete!
[root@server5 ~]#

Download & Install Webmin Distribution Package


[root@server5 ~]# cd /usr/src
[root@server5 src]# wget http://prdownloads.sourceforge.net/webadmin/webmin-1.580-1.noarch.rpm
--2012-04-21 21:06:20--  http://prdownloads.sourceforge.net/webadmin/webmin-1.580-1.noarch.rpm
Resolving prdownloads.sourceforge.net... 216.34.181.59
Connecting to prdownloads.sourceforge.net|216.34.181.59|:80... connected.
HTTP request sent, awaiting response... 301 Moved Permanently
Location: http://downloads.sourceforge.net/project/webadmin/webmin/1.580/webmin-1.580-1.noarch.rpm [following]
--2012-04-21 21:06:20--  http://downloads.sourceforge.net/project/webadmin/webmin/1.580/webmin-1.580-1.noarch.rpm
Resolving downloads.sourceforge.net... 216.34.181.59
Reusing existing connection to prdownloads.sourceforge.net:80.
HTTP request sent, awaiting response... 302 Found
Location: http://nchc.dl.sourceforge.net/project/webadmin/webmin/1.580/webmin-1.580-1.noarch.rpm [following]
--2012-04-21 21:06:21--  http://nchc.dl.sourceforge.net/project/webadmin/webmin/1.580/webmin-1.580-1.noarch.rpm
Resolving nchc.dl.sourceforge.net... 211.79.60.17, 2001:e10:ffff:1f02::17
Connecting to nchc.dl.sourceforge.net|211.79.60.17|:80... connected.
HTTP request sent, awaiting response... 200 OK
Length: 17112780 (16M) [application/octet-stream]
Saving to: âwebmin-1.580-1.noarch.rpmâ

100%[============================================================================>] 17,112,780   235K/s   in 74s

2012-04-21 21:07:36 (225 KB/s) - âwebmin-1.580-1.noarch.rpmâ

[root@server5 src]# rpm -i webmin-1.580-1.noarch.rpm
warning: webmin-1.580-1.noarch.rpm: Header V3 DSA/SHA1 Signature, key ID 11f63c51: NOKEY
Operating system is CentOS Linux
Webmin install complete. You can now login to https://server5:10000/
as root with your root password.
[root@server5 src]#

Jika CentOS 6.2 anda sebelumnya diinstall dengan minimal installation, terlebih dahulu sebelum webmin dapat diakses pada web browser, apache webserver harus terinstall dan aktif. Install Group Apache & MySQL databases dengan menggunakan command berikut:

yum -y groupinstall "Web Server" "MySQL Database"


[root@server5 src]# yum -y groupinstall "Web Server" "MySQL Database"
Loaded plugins: fastestmirror
Loading mirror speeds from cached hostfile
 * base: centos.biz.net.id
 * extras: centos.biz.net.id
 * updates: mirror.averse.net
Setting up Group Process
Checking for new repos for mirrors
http://centos.biz.net.id/6.2/os/x86_64/repodata/badeded316fc87571779d92c5cde816fdc357646b84cb191c4611e05c981ffa1-c6-x86_64-comps.xml.gz: [Errno 14] PYCURL ERROR 18 - "transfer closed with 203863 bytes remaining to read"
Trying other mirror.
base/group_gz                                            | 199 kB     00:00
Warning: Group MySQL Database does not exist.
Resolving Dependencies
--> Running transaction check
---> Package crypto-utils.x86_64 0:2.4.1-24.2.el6 will be installed
--> Processing Dependency: perl(Newt) for package: crypto-utils-2.4.1-24.2.el6.x86_64
---> Package httpd.x86_64 0:2.2.15-15.el6.centos.1 will be installed
--> Processing Dependency: httpd-tools = 2.2.15-15.el6.centos.1 for package: httpd-2.2.15-15.el6.centos.1.x86_64
--> Processing Dependency: /etc/mime.types for package: httpd-2.2.15-15.el6.centos.1.x86_64
--> Processing Dependency: apr-util-ldap for package: httpd-2.2.15-15.el6.centos.1.x86_64
--> Processing Dependency: libaprutil-1.so.0()(64bit) for package: httpd-2.2.15-15.el6.centos.1.x86_64
--> Processing Dependency: libapr-1.so.0()(64bit) for package: httpd-2.2.15-15.el6.centos.1.x86_64
---> Package httpd-manual.noarch 0:2.2.15-15.el6.centos.1 will be installed
---> Package mod_perl.x86_64 0:2.0.4-10.el6 will be installed
--> Processing Dependency: perl(ExtUtils::MakeMaker) for package: mod_perl-2.0.4-10.el6.x86_64
--> Processing Dependency: perl(BSD::Resource) for package: mod_perl-2.0.4-10.el6.x86_64
---> Package mod_ssl.x86_64 1:2.2.15-15.el6.centos.1 will be installed
---> Package mod_wsgi.x86_64 0:3.2-1.el6 will be installed
---> Package webalizer.x86_64 0:2.21_02-3.3.el6 will be installed
--> Processing Dependency: libgd.so.2()(64bit) for package: webalizer-2.21_02-3.3.el6.x86_64
--> Processing Dependency: libpng12.so.0()(64bit) for package: webalizer-2.21_02-3.3.el6.x86_64
--> Running transaction check
---> Package apr.x86_64 0:1.3.9-3.el6_1.2 will be installed
---> Package apr-util.x86_64 0:1.3.9-3.el6_0.1 will be installed
---> Package apr-util-ldap.x86_64 0:1.3.9-3.el6_0.1 will be installed
---> Package gd.x86_64 0:2.0.35-10.el6 will be installed
--> Processing Dependency: libXpm.so.4()(64bit) for package: gd-2.0.35-10.el6.x86_64
--> Processing Dependency: libX11.so.6()(64bit) for package: gd-2.0.35-10.el6.x86_64
--> Processing Dependency: libfontconfig.so.1()(64bit) for package: gd-2.0.35-10.el6.x86_64
--> Processing Dependency: libfreetype.so.6()(64bit) for package: gd-2.0.35-10.el6.x86_64
--> Processing Dependency: libjpeg.so.62()(64bit) for package: gd-2.0.35-10.el6.x86_64
---> Package httpd-tools.x86_64 0:2.2.15-15.el6.centos.1 will be installed
---> Package libpng.x86_64 2:1.2.48-1.el6_2 will be installed
---> Package mailcap.noarch 0:2.1.31-2.el6 will be installed
---> Package perl-BSD-Resource.x86_64 0:1.29.03-3.el6 will be installed
---> Package perl-ExtUtils-MakeMaker.x86_64 0:6.55-119.el6_1.1 will be installed
--> Processing Dependency: perl(Test::Harness) for package: perl-ExtUtils-MakeMaker-6.55-119.el6_1.1.x86_64
--> Processing Dependency: perl-devel for package: perl-ExtUtils-MakeMaker-6.55-119.el6_1.1.x86_64
---> Package perl-Newt.x86_64 0:1.08-26.el6 will be installed
--> Running transaction check
---> Package fontconfig.x86_64 0:2.8.0-3.el6 will be installed
---> Package freetype.x86_64 0:2.3.11-6.el6_2.9 will be installed
---> Package libX11.x86_64 0:1.3-2.el6 will be installed
--> Processing Dependency: libX11-common = 1.3-2.el6 for package: libX11-1.3-2.el6.x86_64
--> Processing Dependency: libxcb.so.1()(64bit) for package: libX11-1.3-2.el6.x86_64
---> Package libXpm.x86_64 0:3.5.8-2.el6 will be installed
---> Package libjpeg.x86_64 0:6b-46.el6 will be installed
---> Package perl-Test-Harness.x86_64 0:3.17-119.el6_1.1 will be installed
---> Package perl-devel.x86_64 4:5.10.1-119.el6_1.1 will be installed
--> Processing Dependency: perl(ExtUtils::ParseXS) for package: 4:perl-devel-5.10.1-119.el6_1.1.x86_64
--> Running transaction check
---> Package libX11-common.noarch 0:1.3-2.el6 will be installed
---> Package libxcb.x86_64 0:1.5-1.el6 will be installed
--> Processing Dependency: libXau.so.6()(64bit) for package: libxcb-1.5-1.el6.x86_64
---> Package perl-ExtUtils-ParseXS.x86_64 1:2.2003.0-119.el6_1.1 will be installed
--> Running transaction check
---> Package libXau.x86_64 0:1.0.5-1.el6 will be installed
--> Finished Dependency Resolution

Dependencies Resolved

================================================================================
 Package                   Arch     Version                     Repository
                                                                           Size
================================================================================
Installing:
 crypto-utils              x86_64   2.4.1-24.2.el6              base       76 k
 httpd                     x86_64   2.2.15-15.el6.centos.1      updates   813 k
 httpd-manual              noarch   2.2.15-15.el6.centos.1      updates   781 k
 mod_perl                  x86_64   2.0.4-10.el6                base      3.2 M
 mod_ssl                   x86_64   1:2.2.15-15.el6.centos.1    updates    87 k
 mod_wsgi                  x86_64   3.2-1.el6                   base       66 k
 webalizer                 x86_64   2.21_02-3.3.el6             base      128 k
Installing for dependencies:
 apr                       x86_64   1.3.9-3.el6_1.2             base      123 k
 apr-util                  x86_64   1.3.9-3.el6_0.1             base       87 k
 apr-util-ldap             x86_64   1.3.9-3.el6_0.1             base       15 k
 fontconfig                x86_64   2.8.0-3.el6                 base      186 k
 freetype                  x86_64   2.3.11-6.el6_2.9            updates   359 k
 gd                        x86_64   2.0.35-10.el6               base      142 k
 httpd-tools               x86_64   2.2.15-15.el6.centos.1      updates    70 k
 libX11                    x86_64   1.3-2.el6                   base      582 k
 libX11-common             noarch   1.3-2.el6                   base      188 k
 libXau                    x86_64   1.0.5-1.el6                 base       22 k
 libXpm                    x86_64   3.5.8-2.el6                 base       59 k
 libjpeg                   x86_64   6b-46.el6                   base      134 k
 libpng                    x86_64   2:1.2.48-1.el6_2            updates   181 k
 libxcb                    x86_64   1.5-1.el6                   base      100 k
 mailcap                   noarch   2.1.31-2.el6                base       27 k
 perl-BSD-Resource         x86_64   1.29.03-3.el6               base       35 k
 perl-ExtUtils-MakeMaker   x86_64   6.55-119.el6_1.1            base      290 k
 perl-ExtUtils-ParseXS     x86_64   1:2.2003.0-119.el6_1.1      base       42 k
 perl-Newt                 x86_64   1.08-26.el6                 base       72 k
 perl-Test-Harness         x86_64   3.17-119.el6_1.1            base      229 k
 perl-devel                x86_64   4:5.10.1-119.el6_1.1        base      420 k

Transaction Summary
================================================================================
Install      28 Package(s)

Total download size: 8.3 M
Installed size: 24 M
Downloading Packages:
(1/28): apr-1.3.9-3.el6_1.2.x86_64.rpm                   | 123 kB     00:00
(2/28): apr-util-1.3.9-3.el6_0.1.x86_64.rpm              |  87 kB     00:00
(3/28): apr-util-ldap-1.3.9-3.el6_0.1.x86_64.rpm         |  15 kB     00:00
(4/28): crypto-utils-2.4.1-24.2.el6.x86_64.rpm           |  76 kB     00:00
(5/28): fontconfig-2.8.0-3.el6.x86_64.rpm                | 186 kB     00:00
(6/28): freetype-2.3.11-6.el6_2.9.x86_64.rpm             | 359 kB     00:01
(7/28): gd-2.0.35-10.el6.x86_64.rpm                      | 142 kB     00:00
(8/28): httpd-2.2.15-15.el6.centos.1.x86_64.rpm          | 813 kB     00:03
(9/28): httpd-manual-2.2.15-15.el6.centos.1.noarch.rpm   | 781 kB     00:03
(10/28): httpd-tools-2.2.15-15.el6.centos.1.x86_64.rpm   |  70 kB     00:00
(11/28): libX11-1.3-2.el6.x86_64.rpm                     | 582 kB     00:02
(12/28): libX11-common-1.3-2.el6.noarch.rpm              | 188 kB     00:00
(13/28): libXau-1.0.5-1.el6.x86_64.rpm                   |  22 kB     00:00
(14/28): libXpm-3.5.8-2.el6.x86_64.rpm                   |  59 kB     00:00
(15/28): libjpeg-6b-46.el6.x86_64.rpm                    | 134 kB     00:00
(16/28): libpng-1.2.48-1.el6_2.x86_64.rpm                | 181 kB     00:00
(17/28): libxcb-1.5-1.el6.x86_64.rpm                     | 100 kB     00:00
(18/28): mailcap-2.1.31-2.el6.noarch.rpm                 |  27 kB     00:00
(19/28): mod_perl-2.0.4-10.el6.x86_64.rpm                | 3.2 MB     00:13
(20/28): mod_ssl-2.2.15-15.el6.centos.1.x86_64.rpm       |  87 kB     00:00
(21/28): mod_wsgi-3.2-1.el6.x86_64.rpm                   |  66 kB     00:00
(22/28): perl-BSD-Resource-1.29.03-3.el6.x86_64.rpm      |  35 kB     00:00
(23/28): perl-ExtUtils-MakeMaker-6.55-119.el6_1.1.x86_64 | 290 kB     00:01
(24/28): perl-ExtUtils-ParseXS-2.2003.0-119.el6_1.1.x86_ |  42 kB     00:00
(25/28): perl-Newt-1.08-26.el6.x86_64.rpm                |  72 kB     00:00
(26/28): perl-Test-Harness-3.17-119.el6_1.1.x86_64.rpm   | 229 kB     00:01
(27/28): perl-devel-5.10.1-119.el6_1.1.x86_64.rpm        | 420 kB     00:01
(28/28): webalizer-2.21_02-3.3.el6.x86_64.rpm            | 128 kB     00:00
--------------------------------------------------------------------------------
Total                                           217 kB/s | 8.3 MB     00:39
Running rpm_check_debug
Running Transaction Test
Transaction Test Succeeded
Running Transaction
Warning: RPMDB altered outside of yum.
  Installing : apr-1.3.9-3.el6_1.2.x86_64                                  1/28
  Installing : apr-util-1.3.9-3.el6_0.1.x86_64                             2/28
  Installing : 2:libpng-1.2.48-1.el6_2.x86_64                              3/28
  Installing : freetype-2.3.11-6.el6_2.9.x86_64                            4/28
  Installing : fontconfig-2.8.0-3.el6.x86_64                               5/28
  Installing : apr-util-ldap-1.3.9-3.el6_0.1.x86_64                        6/28
  Installing : httpd-tools-2.2.15-15.el6.centos.1.x86_64                   7/28
  Installing : 1:perl-ExtUtils-ParseXS-2.2003.0-119.el6_1.1.x86_64         8/28
  Installing : 4:perl-devel-5.10.1-119.el6_1.1.x86_64                      9/28
  Installing : perl-Test-Harness-3.17-119.el6_1.1.x86_64                  10/28
  Installing : perl-ExtUtils-MakeMaker-6.55-119.el6_1.1.x86_64            11/28
  Installing : libXau-1.0.5-1.el6.x86_64                                  12/28
  Installing : libxcb-1.5-1.el6.x86_64                                    13/28
  Installing : libjpeg-6b-46.el6.x86_64                                   14/28
  Installing : mailcap-2.1.31-2.el6.noarch                                15/28
  Installing : httpd-2.2.15-15.el6.centos.1.x86_64                        16/28
  Installing : perl-Newt-1.08-26.el6.x86_64                               17/28
  Installing : perl-BSD-Resource-1.29.03-3.el6.x86_64                     18/28
  Installing : libX11-common-1.3-2.el6.noarch                             19/28
  Installing : libX11-1.3-2.el6.x86_64                                    20/28
  Installing : libXpm-3.5.8-2.el6.x86_64                                  21/28
  Installing : gd-2.0.35-10.el6.x86_64                                    22/28
  Installing : webalizer-2.21_02-3.3.el6.x86_64                           23/28
  Installing : mod_perl-2.0.4-10.el6.x86_64                               24/28
  Installing : crypto-utils-2.4.1-24.2.el6.x86_64                         25/28
  Installing : httpd-manual-2.2.15-15.el6.centos.1.noarch                 26/28
  Installing : mod_wsgi-3.2-1.el6.x86_64                                  27/28
  Installing : 1:mod_ssl-2.2.15-15.el6.centos.1.x86_64                    28/28

Installed:
  crypto-utils.x86_64 0:2.4.1-24.2.el6
  httpd.x86_64 0:2.2.15-15.el6.centos.1
  httpd-manual.noarch 0:2.2.15-15.el6.centos.1
  mod_perl.x86_64 0:2.0.4-10.el6
  mod_ssl.x86_64 1:2.2.15-15.el6.centos.1
  mod_wsgi.x86_64 0:3.2-1.el6
  webalizer.x86_64 0:2.21_02-3.3.el6

Dependency Installed:
  apr.x86_64 0:1.3.9-3.el6_1.2
  apr-util.x86_64 0:1.3.9-3.el6_0.1
  apr-util-ldap.x86_64 0:1.3.9-3.el6_0.1
  fontconfig.x86_64 0:2.8.0-3.el6
  freetype.x86_64 0:2.3.11-6.el6_2.9
  gd.x86_64 0:2.0.35-10.el6
  httpd-tools.x86_64 0:2.2.15-15.el6.centos.1
  libX11.x86_64 0:1.3-2.el6
  libX11-common.noarch 0:1.3-2.el6
  libXau.x86_64 0:1.0.5-1.el6
  libXpm.x86_64 0:3.5.8-2.el6
  libjpeg.x86_64 0:6b-46.el6
  libpng.x86_64 2:1.2.48-1.el6_2
  libxcb.x86_64 0:1.5-1.el6
  mailcap.noarch 0:2.1.31-2.el6
  perl-BSD-Resource.x86_64 0:1.29.03-3.el6
  perl-ExtUtils-MakeMaker.x86_64 0:6.55-119.el6_1.1
  perl-ExtUtils-ParseXS.x86_64 1:2.2003.0-119.el6_1.1
  perl-Newt.x86_64 0:1.08-26.el6
  perl-Test-Harness.x86_64 0:3.17-119.el6_1.1
  perl-devel.x86_64 4:5.10.1-119.el6_1.1

Complete!
[root@server5 src]#

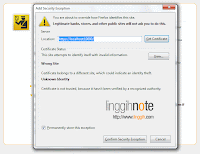
Login ke webmin pada alamat URL https://[Alamat IP]:10000/ menggunakan detail login user & password root. Jika web browser menampilkan pesan peringatan This Connection is Untrusted, klik tombol Add Exception..., kemudian centang checkbox Permanently store this exception klik tombol Confirm Security Exception.

Install Webmin

Install Webmin: Untrusted Connection

Install Webmin 2

Install Webmin: Confirm Security Exception

Install Webmin 3

Install Webmin: Login Webmin Server


Install Webmin 4

Install Webmin: Webmin Web Interface


Uninstall Webmin

Untuk uninstall webmin, ketikkan command;

/etc/webmin/uninstall.sh.


[root@server5 ~]# /etc/webmin/uninstall.sh
Are you sure you want to uninstall Webmin? (y/n) : y

Removing webmin RPM ..
Running uninstall scripts ..
Deleted init script /etc/rc.d/init.d/webmin
Subroutine list_servers redefined at /usr/libexec/webmin/servers/servers-lib.pl line 91.
Subroutine list_servers_sorted redefined at /usr/libexec/webmin/servers/servers-lib.pl line 110.
Subroutine get_server redefined at /usr/libexec/webmin/servers/servers-lib.pl line 142.
Subroutine save_server redefined at /usr/libexec/webmin/servers/servers-lib.pl line 157.
Subroutine delete_server redefined at /usr/libexec/webmin/servers/servers-lib.pl line 174.
Subroutine can_use_server redefined at /usr/libexec/webmin/servers/servers-lib.pl line 187.
Subroutine list_all_groups redefined at /usr/libexec/webmin/servers/servers-lib.pl line 207.
Subroutine logged_in redefined at /usr/libexec/webmin/servers/servers-lib.pl line 275.
Subroutine get_server_types redefined at /usr/libexec/webmin/servers/servers-lib.pl line 300.
Subroutine this_server redefined at /usr/libexec/webmin/servers/servers-lib.pl line 310.
Subroutine get_my_address redefined at /usr/libexec/webmin/servers/servers-lib.pl line 329.
Subroutine address_to_broadcast redefined at /usr/libexec/webmin/servers/servers-lib.pl line 358.
Subroutine test_server redefined at /usr/libexec/webmin/servers/servers-lib.pl line 372.
Subroutine find_cron_job redefined at /usr/libexec/webmin/servers/servers-lib.pl line 391.
Subroutine find_servers redefined at /usr/libexec/webmin/servers/servers-lib.pl line 404.
Done!
[root@server5 ~]#

Selesai. Semoga bermanfaat.
:)
22 April 2012

Download Dokumen PDF Scribd Gratis

Scribd.Com merupakan salah satu situs online platform social reading, sharing presentation & document publishing terbesar saat ini. Melalui situs ini anda dapat mencari text dokumen dengan subjek materi tertentu atau jika sebagai author/pubhliser artikel gunakan situs ini untuk sharing dokumen anda. Situs ini hampir mirip dengan YouTube.Com, hanya saja materi yang dapat anda submit atau lihat (cari) adalah berupa text dokumen.

Anda bisa download (mengunduh) file teks dokumen dari situs ini, hanya saja anda harus punya status keanggotaan & diharuskan membayar biaya subscription (berlangganan).

[caption id="attachment_721" align="alignleft" width="150" caption="Scribd: Download"]Download Gratis PDF Scribd[/caption][caption id="attachment_722" align="alignleft" width="150" caption="Scribd: Login Required"]Download PDF Gratis Scribd[/caption][caption id="attachment_723" align="alignleft" width="150" caption="Scribd: Download 2"]Download PDF Gratis Scribd 2[/caption]


[caption id="attachment_724" align="alignleft" width="150" caption="Scribd: Subscription"]Download PDF Gratis Scribd 3[/caption]


Namun ada cara gampang untuk download file dokumen dari scribd.com gratis tanpa bayar. Caranya:


  1. Buka situs scribd-downloader.com

    [caption id="attachment_725" align="alignleft" width="150" caption="Scribd: Scribd-Downloader"]Scribd PDF Download 4[/caption]


  2. Copy dan pastekan alamat url dokumen yang akan didownload pada situs scribd pada kotak "Insert the scribd document LINK to download:" (lihat gambar). Isi karakter verifikasi pada gambar captcha, kemudian klik tombol "Download File". Tunggu sampai dokumen pdf selesai diproses sampai tersedia untuk didownload.

    [caption id="attachment_726" align="alignleft" width="150" caption="Scribd: Copy URL"]Download Scribd PDF Gratis 5[/caption][caption id="attachment_727" align="alignleft" width="150" caption="Scribd: Paste URL, Captcha, Download"]Download Scribd PDF Gratis 6[/caption][caption id="attachment_728" align="alignleft" width="150" caption="Scribd: Proses Dokumen"]Download PDF Gratis Scribd 11[/caption]


    [caption id="attachment_729" align="alignleft" width="150" caption="Scribd: Download Start"]Download PDF Gratis Scribd 7[/caption]


  3. Tunggu sampai download selesai diproses & buka dokumen PDF.

    [caption id="attachment_730" align="alignleft" width="150" caption="Scribd: Download Proses"]Download PDF Gratis Scribd 8[/caption][caption id="attachment_731" align="alignleft" width="150" caption="Scribd: Download Complete"]Download PDF Gratis Scribd 9[/caption][caption id="attachment_732" align="alignleft" width="150" caption="Scribd: Open PDF"]Download PDF Gratis Scribd 12[/caption]


Selesai. Semoga membantu
:D
19 April 2012

Membuat File Menggunakan Command "touch" Pada OS Berbasis Linux

Command "touch" pada OS berbasis linux adalah merupakan cara termudah untuk membuat file serta update detail tanggal dan waktu (timestamps) file/folder dimodifikasi.

Syntax command touch adalah:

touch [option] nama_file

[bash]
[linggih@localhost ~]$ touch testingfile
[linggih@localhost ~]$ ls -l
total 0
-rw-rw-r-- 1 linggih linggih 0 Apr 19 22:23 testingfile
[linggih@localhost ~]$
[/bash]

Contoh di atas tanpa menggunakan opsi (option), touch akan membuat file dengan nama sesuai argumen/input data (testingfile) jika file sesuai input data (testingfile) tidak ada pada direktori file dibuat. Command touch juga dapat digunakan untuk membuat file lebih dari satu, contoh: command berikut ini akan membuat tiga file dengan nama testingfile1, testingfile2 dan testingfile3:

Command:

touch testingfile1 testingfile2 testingfile3

[bash]
[linggih@localhost ~]$ touch testingfile1 testingfile2 testingfile3
[linggih@localhost ~]$ ls -l
total 0
-rw-rw-r-- 1 linggih linggih 0 Apr 19 22:23 testingfile
-rw-rw-r-- 1 linggih linggih 0 Apr 19 22:29 testingfile1
-rw-rw-r-- 1 linggih linggih 0 Apr 19 22:29 testingfile2
-rw-rw-r-- 1 linggih linggih 0 Apr 19 22:29 testingfile3
[linggih@localhost ~]$
[/bash]

Modifikasi tanggal dan waktu (timestamps) menggunakan command touch

Command touch dapat digunakan untuk update tanggal dan waktu mundur (masa lampau) atau maju (masa depan). Contoh:


  1. Modifikasi tanggal dan waktu ke masa lalu:

    [bash]
    [linggih@localhost ~]$ touch -t 0705151700 testingfile1
    [linggih@localhost ~]$ ls -l --full-time testingfile1
    -rw-rw-r-- 1 linggih linggih 0 2007-05-15 17:00:00.000000000 +0700 testingfile1
    [linggih@localhost ~]$ ls -l
    total 0
    -rw-rw-r-- 1 linggih linggih 0 Apr 19 22:23 testingfile
    -rw-rw-r-- 1 linggih linggih 0 May 15 2007 testingfile1
    -rw-rw-r-- 1 linggih linggih 0 Apr 19 22:29 testingfile2
    -rw-rw-r-- 1 linggih linggih 0 Apr 19 22:29 testingfile3
    [linggih@localhost ~]$
    [/bash]

    Opsi (option) --full-time → timestamp testingfile1 15 Mei 2007 jam 5 sore (17:00:00).


  2. Modifikasi tanggal dan waktu ke masa depan:

    [bash]
    [linggih@localhost ~]$ touch -t 1509171900 testingfile2
    [linggih@localhost ~]$ ls -l --full-time testingfile2
    -rw-rw-r-- 1 linggih linggih 0 2015-09-17 19:00:00.000000000 +0700 testingfile2
    [linggih@localhost ~]$ ls -l
    total 0
    -rw-rw-r-- 1 linggih linggih 0 Apr 19 22:23 testingfile
    -rw-rw-r-- 1 linggih linggih 0 May 15 2007 testingfile1
    -rw-rw-r-- 1 linggih linggih 0 Sep 17 2015 testingfile2
    -rw-rw-r-- 1 linggih linggih 0 Apr 19 22:29 testingfile3
    [linggih@localhost ~]$
    [/bash]

    Opsi (option) --full-time → timestamp testingfile2 17 September 2015 jam 7 malam (19:00:00).


Selesai. Semoga bermanfaat...
:D
18 April 2012

WordPress Load Order Plugin

Default load plugin WordPress, di load (dimuat) berdasarkan urutan alphabet nama plugin. Jika anda ingin menentukan load plugin WordPress sesuai minat, anda bisa menggunakan Plugin "WordPress Load Order Plugin".

Pemakaian plugin ini sangat gampang, dengan interface drag & drop akan memudahkan anda untuk mengurutkan order load plugin dengan mudah. Suatu misal jika anda ingin plugin "Facebook Like Button" dimuat pada urutan paling akhir, anda tinggal klik pada menu "Plugin order" kemudian drag & drop plugin pada urutan sesuai keinginan anda.

Screenshot:

[caption id="attachment_711" align="alignnone" width="300" caption="WordPress Load Order Plugin"]WordPress Load Order Plugin[/caption]


[caption id="attachment_712" align="alignnone" width="300" caption="Screenshot: WordPress Load Order Plugin 2"]Screenshot: WordPress Load Order Plugin 2[/caption]


[caption id="attachment_713" align="alignnone" width="300" caption="Screenshot: WordPress Load Order Plugin 3"]Screenshot: WordPress Load Order Plugin 3[/caption]

Download WordPress Load Order Plugin
08 April 2012

Extract Subtitle Dari File Video MKV

MKVExtract GUI merupakan software extractor file MKV yang dapat extract file video, audio atau text subtitle dari file video MKV. Pada artikel kali ini akan mengulas sedikit tentang bagaimana cara extract file subtitle khusus dari file video MKV, yang nantinya mungkin akan anda gunakan atau diterjemahkan ke bahasa lain (bahasa Indonesia misalnya).

Untuk memulai, yang anda perlukan diantaranya:


  1. File video MKV built-in track subtitle (biasanya blu-ray movies)

  2. MKVToolnix. Donwload Softare Gratisnya di sini

  3. MKVExtractGUI. Donwload Softare Gratisnya di sini


Pertama. Setelah download "MKVToolnix", install di komputer anda. Kemudian download & extract file MKVExtractGUI ke direktori install MKVToolnix (Drive:\Program Files (x86) (atau Program Files untuk OS 32-bit)\MKVToolNix).

[caption id="attachment_694" align="alignnone" width="300" caption="Extract MKVExtractGUI"]Extract MKVExtractGUI[/caption]

Buka file "MKVExtractGUI2.exe" (klik kanan → "Open", atau klik 2 kali file "MKVExtractGUI2.exe"), kemudian browse ke file video MKV.

[caption id="attachment_695" align="alignnone" width="300" caption="MKVExtractGUI - Browse Video"]MKVExtractGUI - Browse Video[/caption]

Tentukan lokasi output file subtitle yang akan di extract, centang checkbox subtitle kemudian klik tombol "Extract".

[caption id="attachment_696" align="alignnone" width="300" caption="MKVExtractGUI - Extract"]MKVExtractGUI - Extract[/caption]

Selesai. File subtitle sudah berhasil di extract & siap untuk anda gunakan atau diterjemahkan.

[caption id="attachment_697" align="alignnone" width="300" caption="MKVExtractGUI - Extracted Subtitle File"]MKVExtractGUI - Extracted Subtitle File[/caption]

Contoh hasil extract subtitle yang sudah saya coba terjemahkan, dapat anda lihat dan download pada halaman ini.

Semoga membantu.
:D
Loncat ke Atas ↑